
As I pursued ways to make life better (or, rather, more comfortable), I started looking for a solution that would help me write Helm charts. It was also supposed to improve my understanding of dependencies: what values are substituted in the charts and where they come from. Amid my research, I came across a program called Monokle. Its description reads: “Monokle is an open-source desktop tool that takes the grunt work out of working with your Kubernetes manifests. It allows you to quickly find any incompatibilities or incorrect code and deploy your charts directly into the K8s cluster.” The description looked intriguing, so I proceeded to install it.
What is Monokle?
Monokle is mostly an Electron app with a dash of React and TypeScript. The project was published on GitHub on April 21, 2021. It is being actively developed and has racked up more than 700 stars. It supports plugins as JSON files (aka templates) that help create resources. Currently, it can create the resources such as Basic Pod, Basic Job, Basic Service, Deployment, and StatefulSet + RBAC. However, the selection of plugins available out of the box is relatively sparse.
Monokle offers the following features out of the box:
- validating charts, tracking dependencies, and identifying problem areas;
- using templates to compose cluster resources from scratch;
- deploying charts into the cluster directly from the application;
- comparing the charts in the cluster with locally available charts;
- browsing and editing cluster resources;
- generating previews for Helm and Kustomize resources based on the given values.
Taking the first steps and trying to get the hang of it
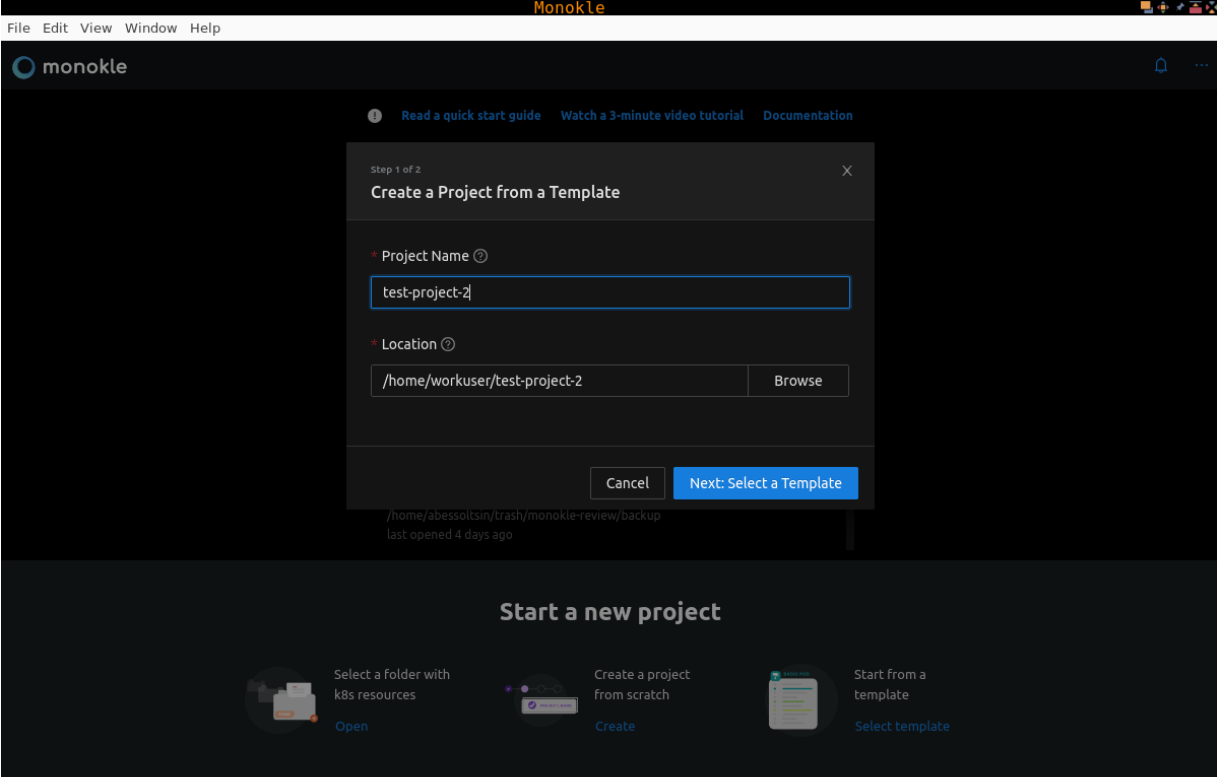
First, I downloaded the appropriate distribution. Once the installation was complete, Monokle offered me three choices: open the current chart directory, create the manifest from scratch, or use the template to create a set of resources.

I opted for the first option and specified a directory that I used with werf (an Open Source tool for building applications and deploying them to Kubernetes; it uses Helm under the hood), which already had YAML templates.
That’s when things got messy. I was able to open the directory, but it only had a few select *.yml or *.yaml files, and I could not determine what the criteria being used to screen them were. For example, I had no luck opening the .gitlab-ci.yml file, no matter how hard I tried. The fact that you cannot open and edit *.tpl files containing additional logic was very frustrating. In the end, I realized I was doing it all wrong and started all over again from scratch.
Before I continue, I would like to mention a few things regarding Monokle interface.
User interface
The program window is split into columns: the first one is used to review the project structure, the second one allows you to view the resources that will be created based on the charts, and the third one is the editor.
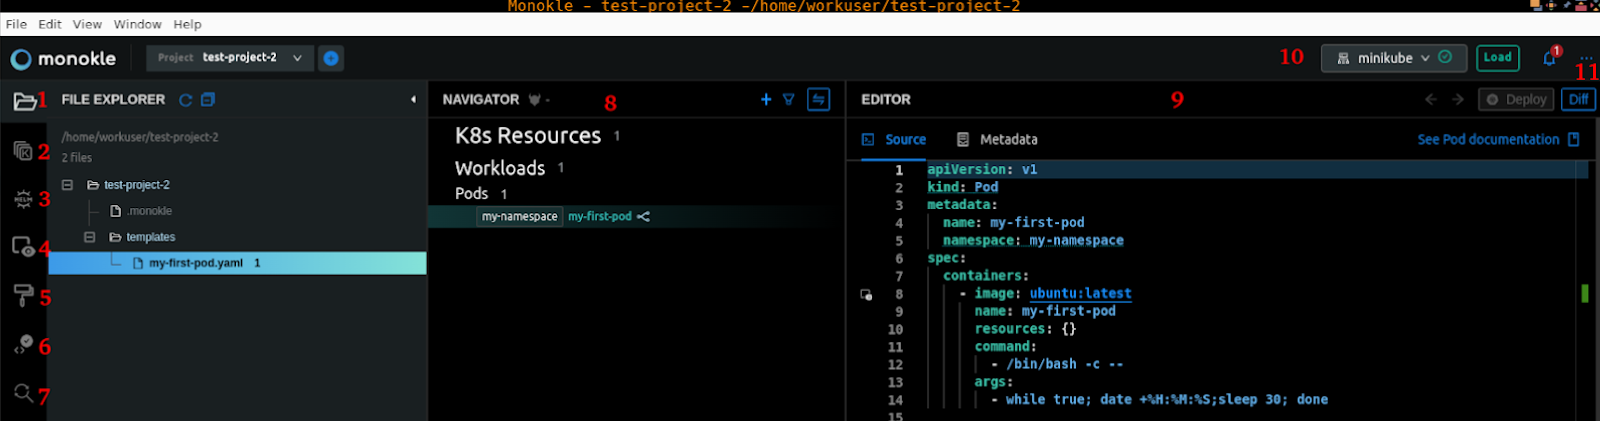
The first column also features many tabs intended to make navigation easier:
- Project files.
- Kustomize structure browser. It’s important to note that Monokle supports not only Helm, but Kustomize as well. So it is still helpful if you prefer to customize your K8s configurations this way.
- Helm structure browser.
- Container images in use in the project (in my case, the only one used is the
ubuntu:latestimage). - Pre-made templates for creating new cluster resources.
- Checking the validity of created resources against various Kubernetes versions.
- Search and replace.
- Resource navigator. This tab allows you to view/verify created resources and links to the resources created in the charts.
- The editor window.
- The current Monokle mode. The following modes are available: None, Cluster mode, Helm Preview, and Kustomize Preview.
- Settings: in this tab, you can select the Kubernetes version, set the location of the
.kube/configfile, and configure how everything works.
Now, let’s come back to try it out.
Starting from scratch
This time, I clicked on “Create a manifest from scratch.” I created a new project directory and copied some template files into it. In my opinion, some of the most popular templates include Advanced Pod, RoleBinding and Service Accounts, as well as Basic Kubernetes StatefulSet. I decided to go with Advanced Pod to understand how the process works and what would come next.
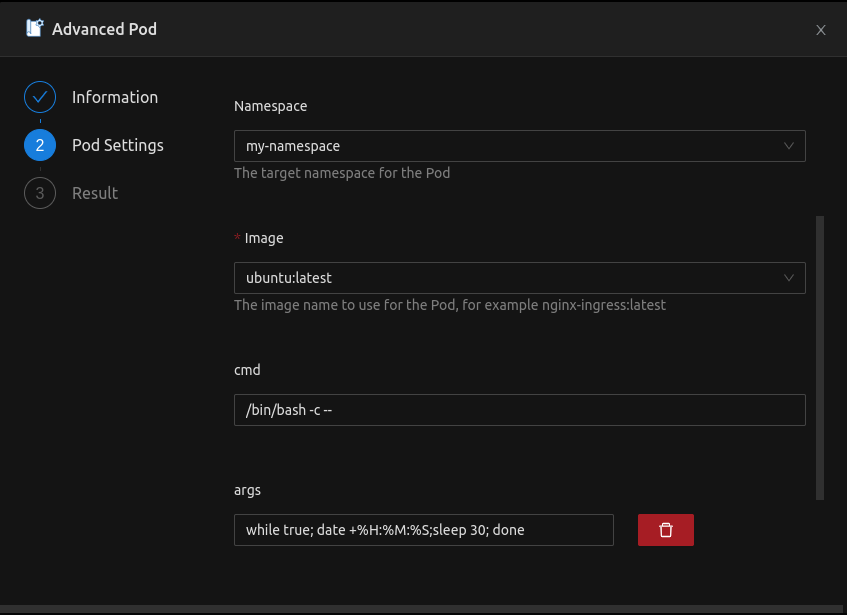
Ultimately, I ended up with a base to start working with. However, I think there is room for improvement in terms of flexibility when you create a project from scratch. While you can outline some things and even deploy them to a cluster, it still might be better. Currently, you’re just getting a bunch of files without any structure.
Helm project template
Since Helm is more common for me, I decided to opt Helm for my test project in Monokle. Its template was created using the helm create mytestproject command. The command also filled the Helm Chart tab with all the necessary data and enabled the Install button in the upper right-hand corner to install the Helm chart to the Kubernetes cluster.
For the second run, there was only a Deploy button, which does almost the same thing. But if you use it, you will have a hard time figuring out what resources have been deployed to the cluster. On top of that, K8s will not monitor whether those resources are healthy or not.

Finally, I was getting closer to what I wanted to see: the structure in the left column resembled the one I usually work with. A full-fledged project template had thus been created!
When the values.yaml file is selected, the Preview button appears on the right. If you click on it, the templates will be filled with the values from the file. This is how the created chart looks:

My Monokle’s current state switched to Helm Preview. In this mode, in the middle Navigator section, you can preview the resources to be created in the cluster. As the name suggests, this mode does not allow anything to be edited. However, you can deploy the generated resources to the Kubernetes cluster to see if there are any inconsistencies.
Next, I decided to deploy something to the Minikube cluster running on my computer. Now it was the Install button’s turn: select the values.yaml file and then either go to Helm Preview and see what resources will be deployed or, if it is a ready-made chart, all you need to do is install it.
Since I didn’t customise anything, another dialogue box popped up:
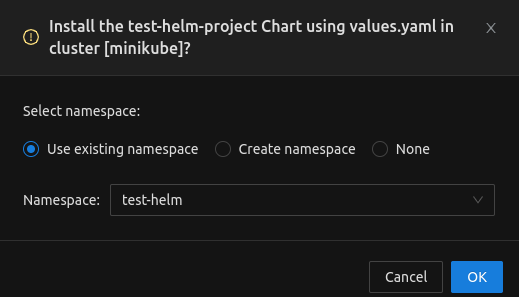
Once the new test-helm namespace was created, it was time to deploy the Helm chart. It was successful:

I could go on and on about Monokle interface, how to create resources, how to edit them, how to compare chart contents with cluster resources, etc. However, I’ve decided to stop there and sum up the experience.
Monokle pros and cons
What I liked
Below are some features of Monokle that I really liked, and that might be reason enough for you to take a closer look at this product (which it certainly deserves!):
- You can create almost any Kubernetes resource via the GUI (more on creating resources).
- There are embedded links to official Kubernetes documentation describing the current resource. They are available in Preview Mode and the editor window.
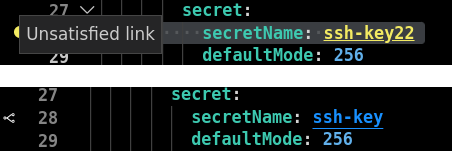
- Syntax highlighting: for example, Monokle will display a message that there is no such Secret if you misspell the Secret’s name (thus indicating an error in the name). The same is true for other cross-linked resources:
- Validating the entire chart for errors: in the Navigation block, charts containing errors or warnings will be highlighted using the corresponding symbol:
- a yellow triangle with an exclamation point indicates that the link leads to a resource that does not exist;
- an exclamation point in a red circle indicates syntax errors. More information about these functions can be found in the official documentation.
- In Preview Mode, you can navigate where the entity is defined instead of going through all the files manually (there’s a special button for that).
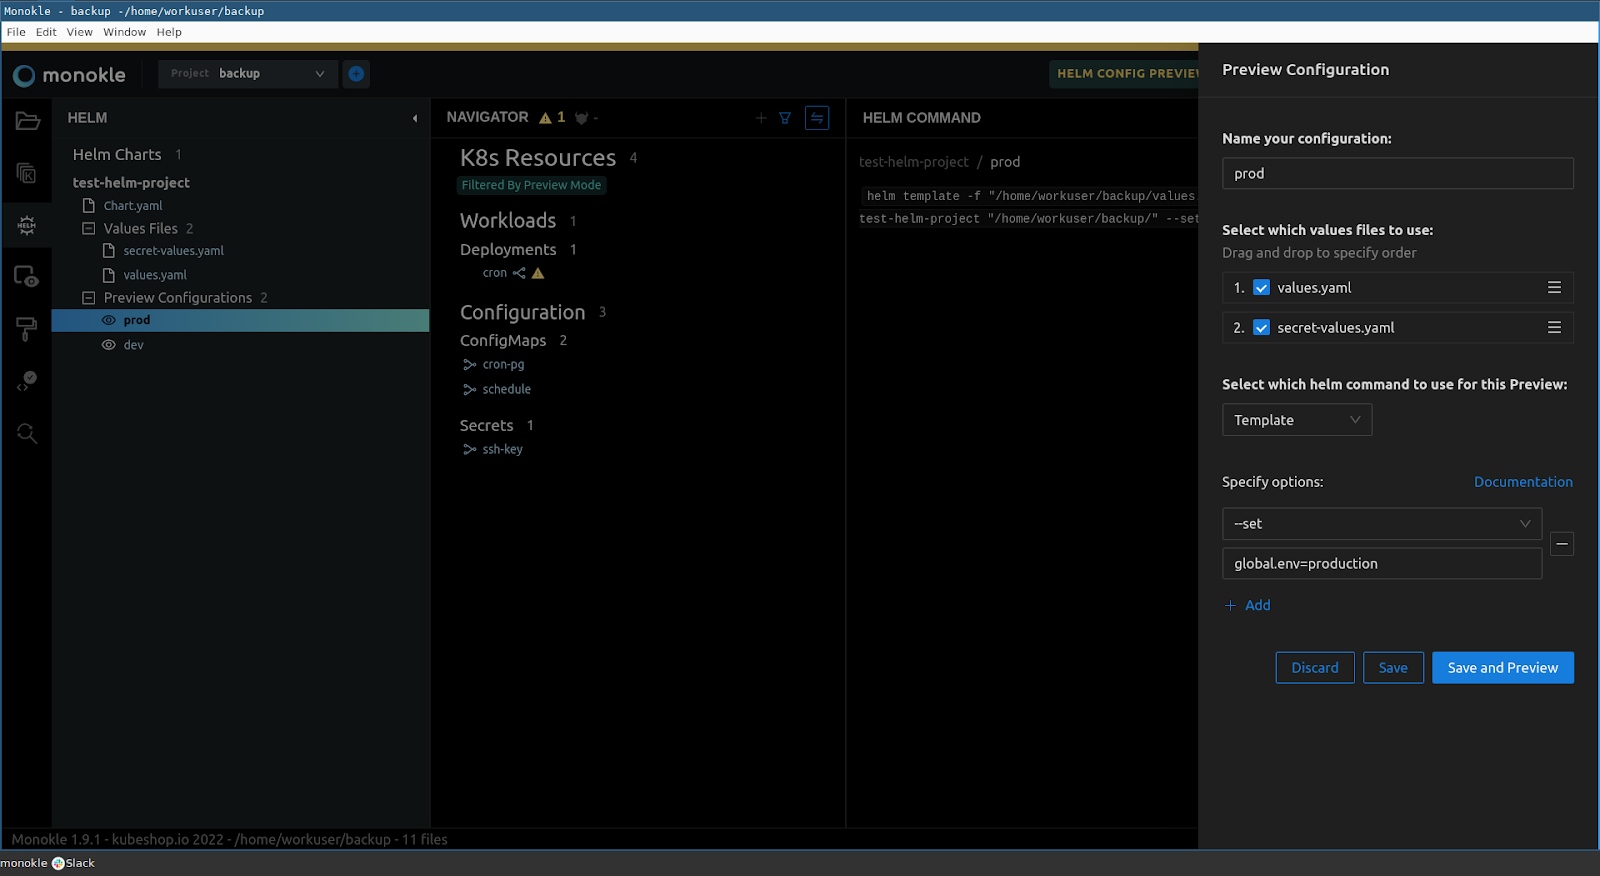
- In Helm Mode, you can use various Helm commands. For example, you can configure an environment via Preview Configuration:
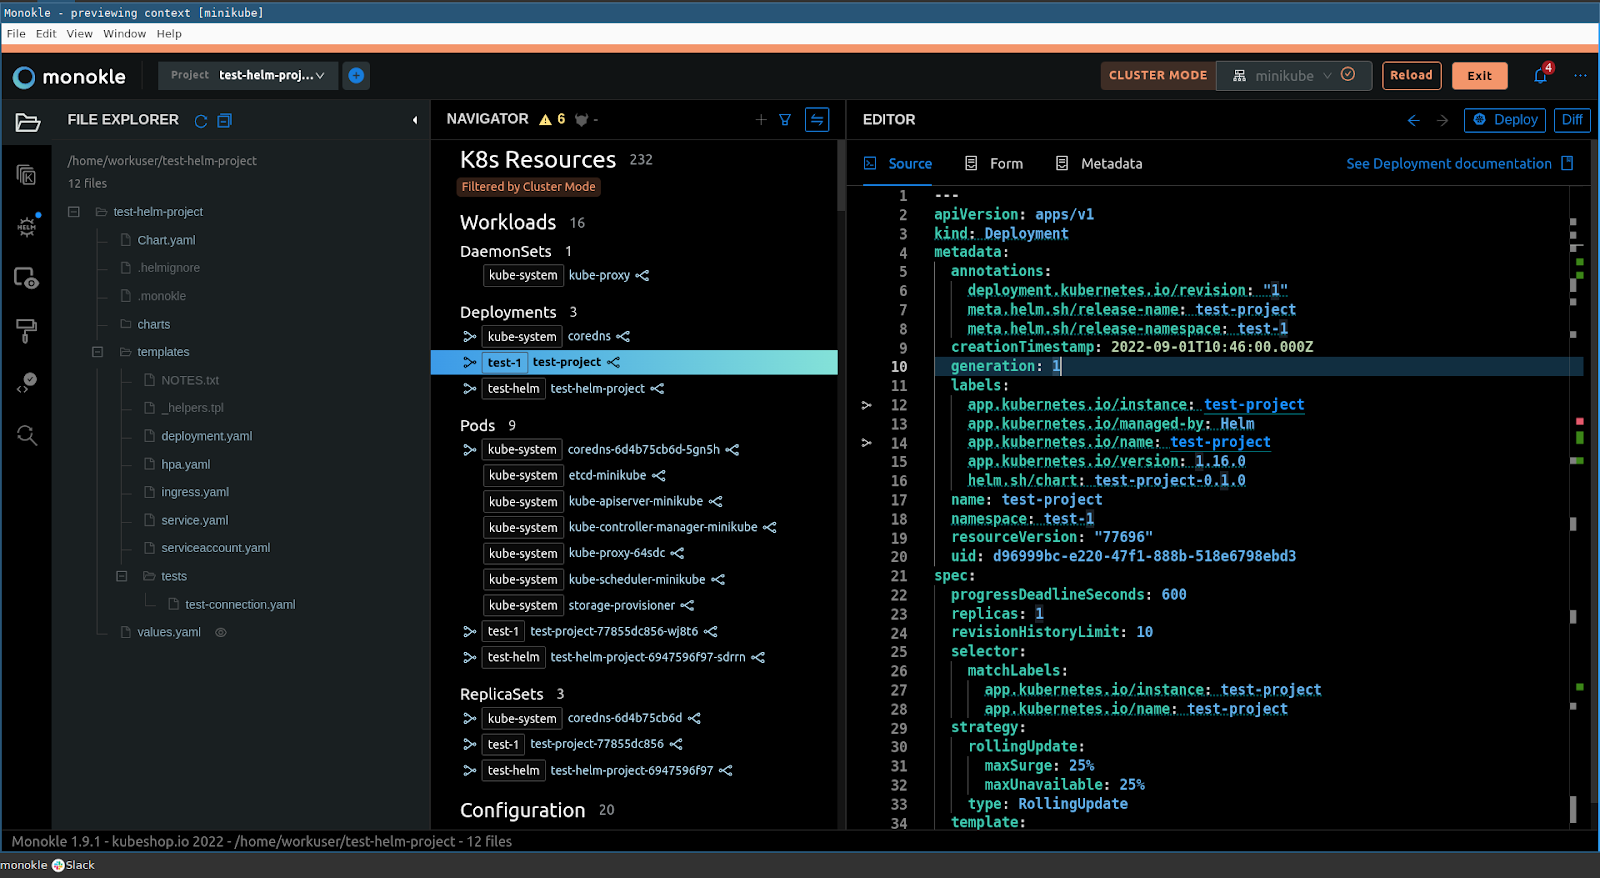
- You can connect to the cluster using
.kube/configand browse the existing resources:
- In comparison mode, you can compare your chart with those available in Kubernetes (you can activate it in the Navigator window by clicking the button with two blue arrows on it).
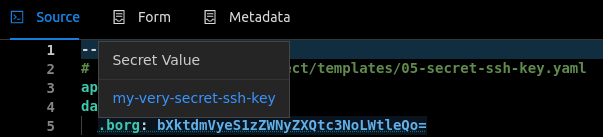
- Decoding base64-encoded data on mouseover:
- Git support. I was missing it in the original 1.9 release I tried. However, it was introduced in the v1.11 release where Monokle was dubbed as “Git-enabled K8s configuration tool & version control editor.” For this, a dedicated Git panel was added to the left menu. It contains Changelist grouped into Staged and Unstaged files, so you can easily see the differences between old & new file versions. The further Monokle releases improved this feature.
And that’s just some of them — I am sure there are many more features you might like.
What I didn’t like
- You can not open some files for editing (I experienced this in v1.9, many of such problems have been fixed in the following v1.10; the most recent Monokle version is v1.13.1, so things might have become even better).
- Monokle was lacking Git support just recently, but I am excited to see it was added to its latest releases. It seems to become better and better with each new version.
- The Preview Configuration configs are stored in Monokle and are not tied to the projects. As a result, you get a bunch of configs for all the projects in the same place.
As a side note, it is also worth noting that Monokle is incompatible with werf’s directory and template structure. So for me, it did not prove as helpful as I had hoped. I was also a little overwhelmed by the very different approach to creating charts/project structure. However, that does not mean much for many others, I guess.
Conclusion
In this article, I shared my experience trying out Monokle, a highly specialized editor for Kubernetes configurations defined with Helm and Kustomize.
Monokle has a good set of tools for creating almost any Kubernetes resource, and you can easily locate the entity you need. The tool may come in handy in mastering K8s — you can use it as an interactive reference. If you already have Helm charts, I definitely suggest you take a closer look at Monokle, too. Will it be sufficient for your specific case? Try it to see.
Thanks to a group of active contributors, the project is rapidly gaining momentum and acquiring new features. Even though some of them seem to be currently missing, there is a good chance they will become available in a future version. Its ecosystem is growing fast — here are two prominent announcements during the last two months alone:
- Initial release of Monokle Cloud (October 24, 2022) — a free, browser-based UI to work with Kubernetes configurations stored in public GitHub repositories.
- The first public release of Monokle CLI (December 8, 2022) — a command-line tool to validate K8s configurations.

Hi,
I wonder what needs to be present to be compatible with Werf. Are CRD available?
Is there a definition of the folder and template structure? Perhaps we can add support easily.
And by the way. 2.0 is out, with lots of improvements on the workflow and performance, and also cluster mode for real time updates.
Hi Sergio! Thank you for this update!
As for possible werf integration, that sounds exciting! Here is the project configuration in werf:
Related reference documentation:
Is it helpful for the start? Feel free to reach the developers in Telegram or GH Discussions for further details.