In this article, we’ll take a look at Coroot, an Open Source tool built using eBPF technology and aimed to be leveraged within Kubernetes or Docker/containerd-based environments and even non-containerized apps. Coroot collects and analyzes telemetry data (metrics, logs, traces, and profiles), transforming it into usable information that allows you to swiftly identify and fix application issues. We’ll go over how to install and configure Coroot for Kubernetes, as well as what it does, along with its pros and cons.
Coroot is a fairly new tool, with the first GitHub commit dating back to August 22, 2022. The team behind this project has rich experience in implementing another observability solution before (it was a proprietary system for infrastructure monitoring). Now, they position Coroot as a comprehensive telemetry gathering and failure monitoring system. Let’s give it a try!
Installing Coroot
Coroot comes in three editions: free (Open Source), Cloud (per-node pricing), and Enterprise (can be a cloud or on-premises installation). Both Cloud and Enterprise include support from the authors; the latter also boasts additional features, such as RBAC (role-based access control), SSO (single sign-on), audit logs, and others.
We are going to install and evaluate the Open Source version of Coroot in our Kubernetes 1.23 cluster.
Installation method #1
To do so, we started with the Kubernetes manifest found in the official repository. The manifest created a Namespace, PersistentVolumeClaim, Deployment, and Service.
However, we wanted to see how the service worked from the outside, without PortForward’ing or other tricks. Thus, we added an Ingress resource. In NGINX, a configuration file was created with an external DNS address you can use to get into the application. Since there is no authorization in place with Coroot, we secured the resource using Dex authorization via GitLab.
Running Coroot in a fault-tolerant configuration: The service has a variable called PG_CONNECTION_STRING. Setting it causes the service to save its configuration in PostgreSQL. In this case, you can run it in a fault-tolerant configuration (but this topic escapes beyond the scope of our article).
Installation method #2
You can install Coroot using the original Helm chart.
The chart installs all the necessary exporters along with Coroot, the Pyroscope code profiling system, and ClickHouse to store its data.
Configuring Coroot
After installation, we can go to the tool’s web interface and create a new project by specifying its name, Prometheus address, and credentials.
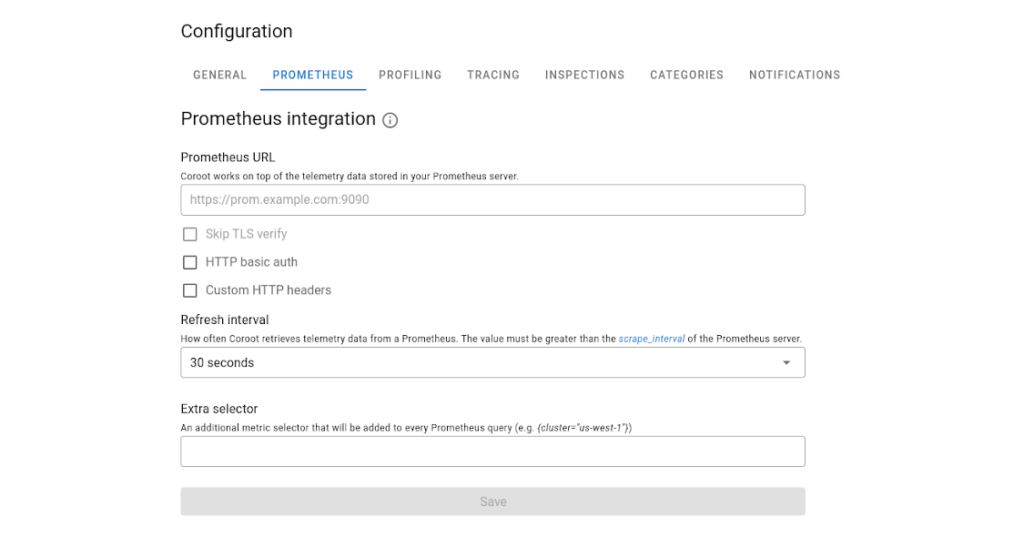
Note: Since our clusters are managed by Deckhouse, the communication with Prometheus is conducted under RBAC authorization, which increases cluster security. So we had to implement a little hack in the form of an NGINX proxy container that gets a token to access Prometheus via RBAC. Coroot cannot authenticate to Prometheus through RBAC out of the box, as it only provides basic authorization.
If you installed Coroot using a regular YAML manifest, you probably need to install coroot-node-agent. This agent is essential in order for Coroot to work and provide you observability insights as it collects metrics from each node.
The next step is to add the node-agent DeamonSet to the deployment, configure metrics collection from the pods, and feed them to Prometheus. Once our Kubernetes setup is complete, many exciting features show up in the Coroot interface.
Coroot features
Pod information
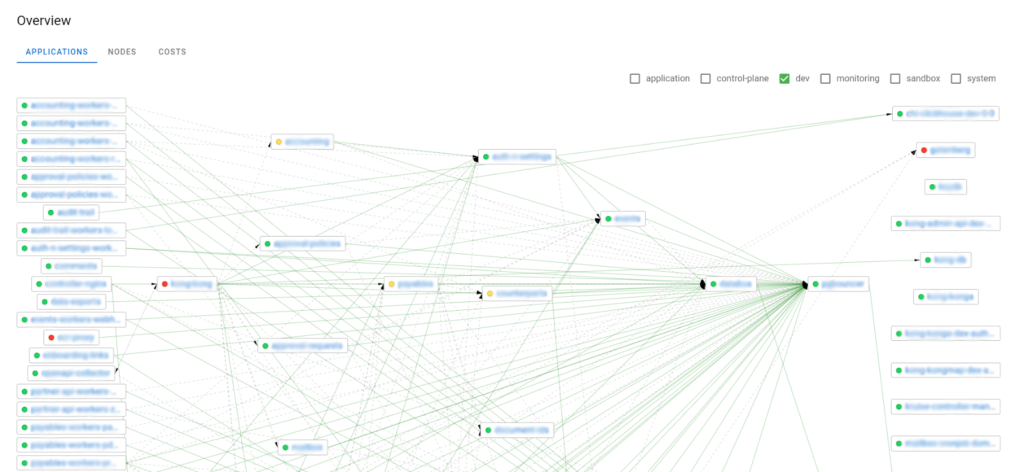
Let’s first examine the networking between the pods:
Note: While we had to blur out the names to avoid revealing infrastructure details, a nice visual demo is available on the Coroot website if you need it.
Both Dev and Ops teams might find this feature rather handy. Even a person not involved in the project will have an easy time understanding how all the services interact by looking at this diagram. Applications highlighted in red are those that Coroot thinks are behaving abnormally (e.g., have high response times). On the downside of this neat feature, you cannot move the blocks to render the layout more readable.
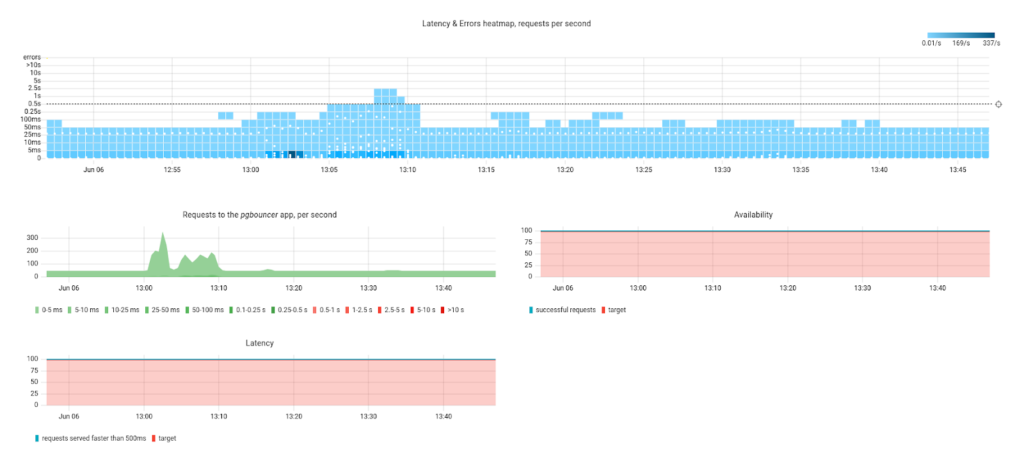
What’s next? You can select a pod to view information on it in greater detail:
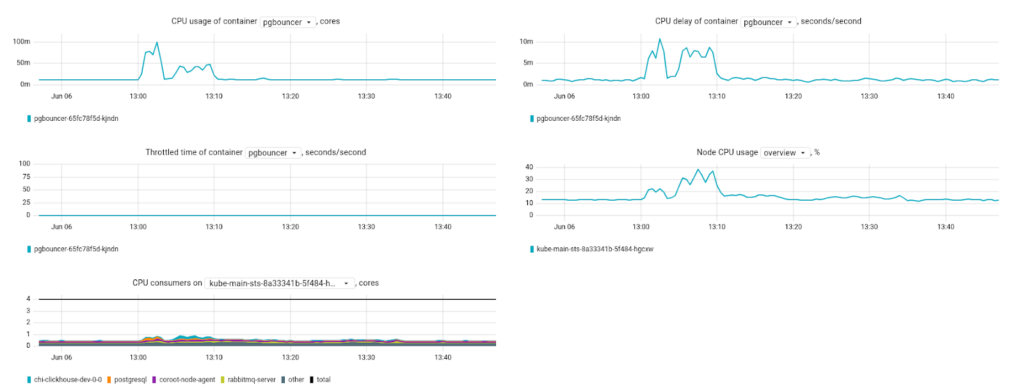
It features CPU usage metrics:
… as well as memory usage metrics:
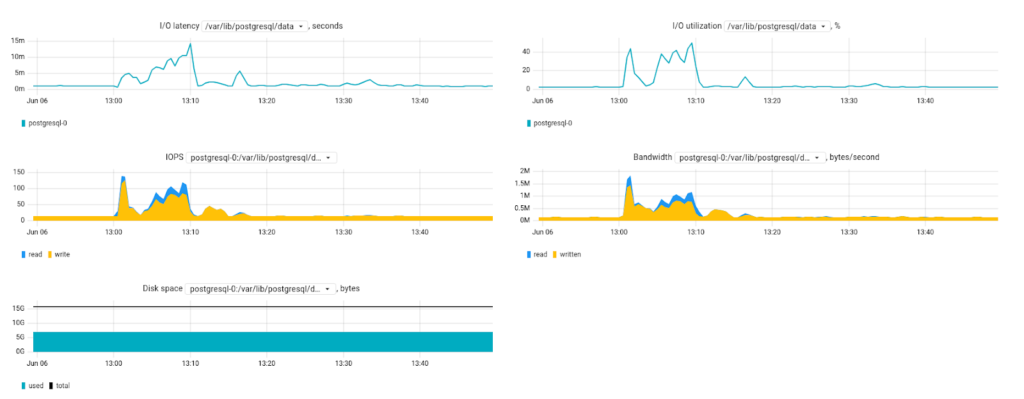
… and disk usage metrics:
Coroot can parse logs and uncover similar messages based on patterns:
Pod filtering
The default dashboard shows pods from all the namespaces. That’s not the most handy thing, so let’s take a look at how to filter them out.
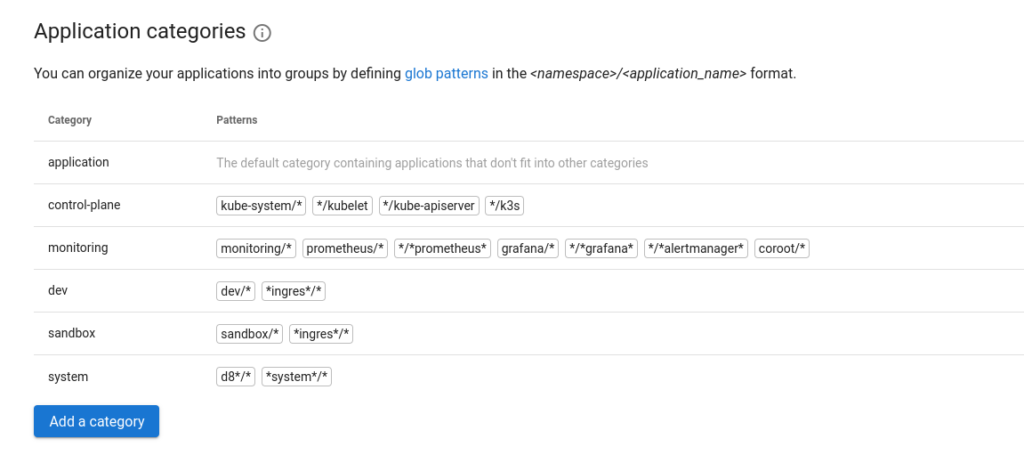
You can do this in the project settings by selecting the application categories. Applications can be grouped by namespace or type. There are also regular expressions to make namespace patterns with — e.g., you can just set it to *review* or *test*.
In the example above, the filtering is done on a per-namespace basis. This is a rather convenient Coroot feature. By applying this kind of filtering, you can gain a more accurate observability picture of where applications are linked to each other within the namespace. If applications are using a resource from another namespace, such as DBMS, that should also be added to the category.
What’s not so great about this feature is that the selected category gets reset when you navigate to another section.
Node status monitoring and alerts
Coroot provides some cool monitoring and notification features:
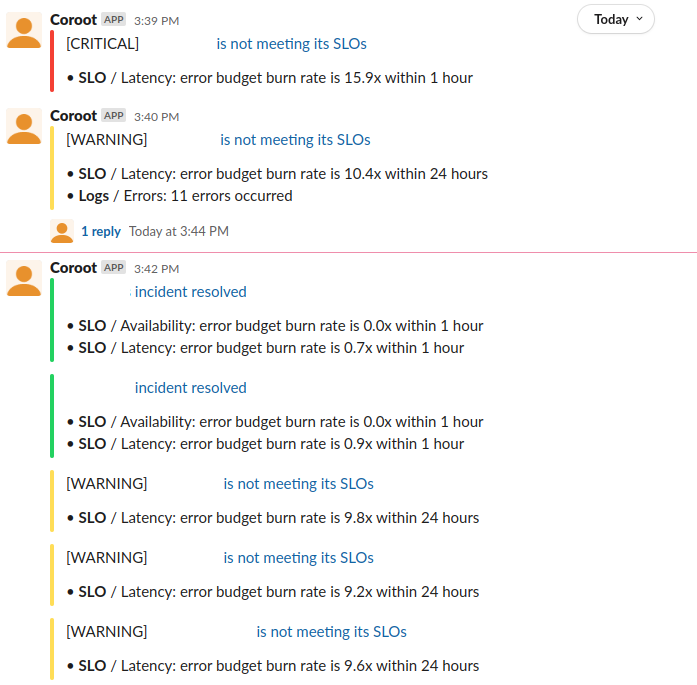
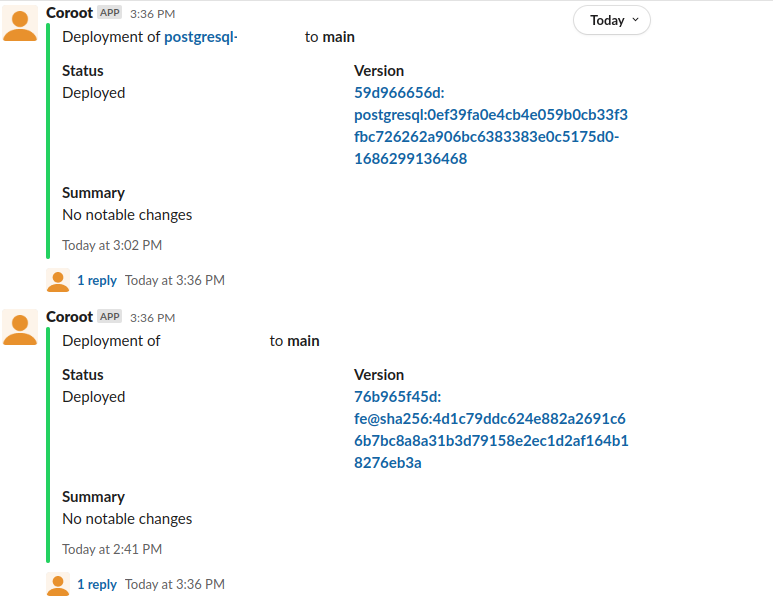
- You can integrate it with your SRE processes relying on Slack, PagerDuty, and Microsoft Teams (sadly not Mattermost at the moment), where it will send alerts regarding the deployment process.
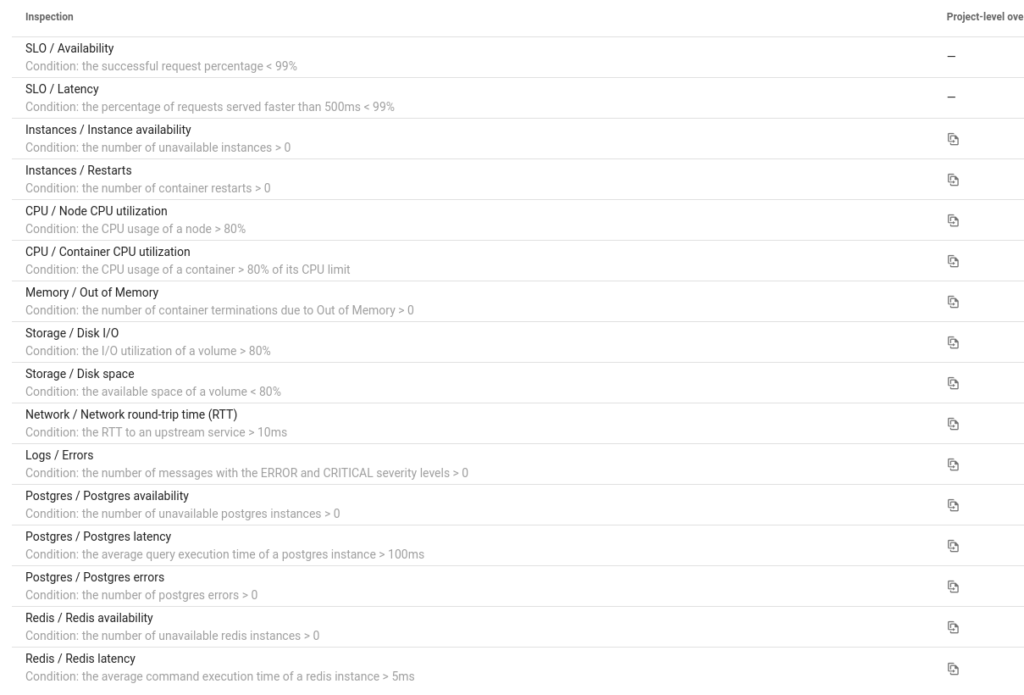
- You can also configure alerts of SLO violations, CPU utilization, Redis unavailability, etc.
For each Kubernetes resource (Deployment or StatefulSet), you can specify a metric to calculate the SLO and the target value.
We used Slack to see how alerting works in Coroot. To do so, we added the Coroot application to the Slack workspace and specified an Oauth token/channel for sending alerts (see the Coroot interface below).
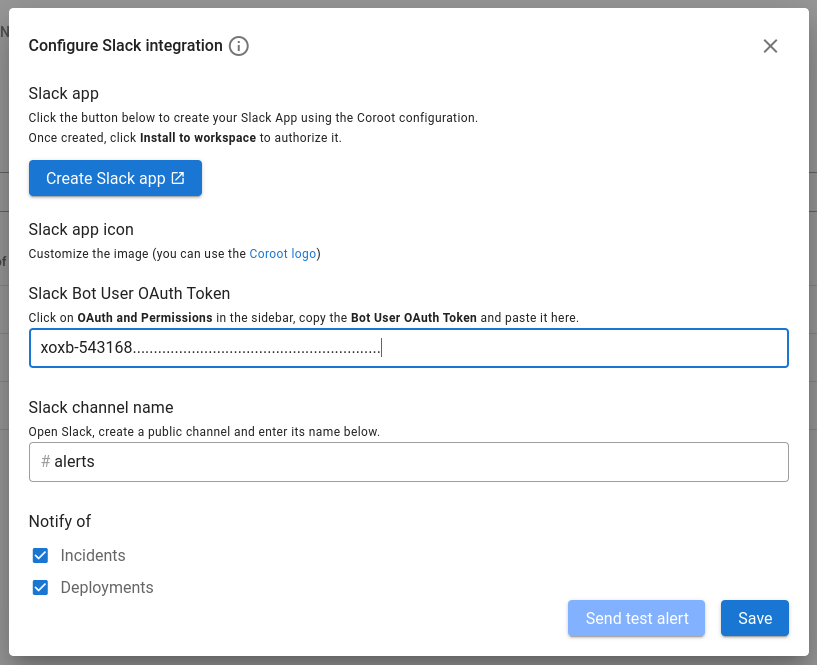
It turned out that the alerts were sent to Slack promptly and seemed quite informative for on-duty SRE engineers:
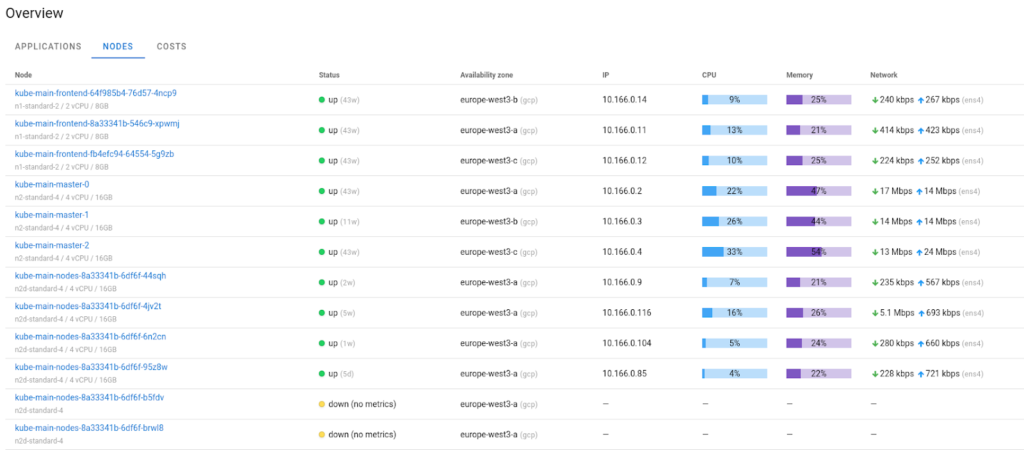
Let’s now take a look at the node monitoring. The Nodes tab shows the state of the node that the agent is running on, and you can easily spot the underutilized or overutilized nodes assisting you in proper resource management:
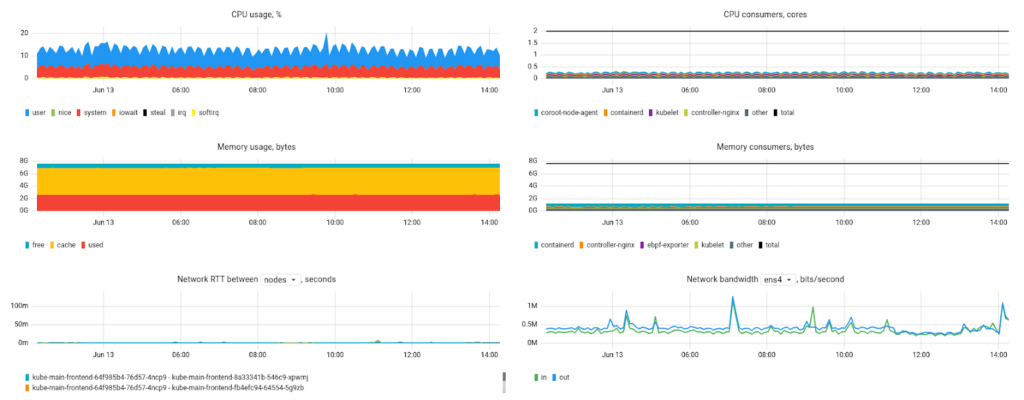
Clicking on the node name opens a little dashboard with the key system metrics presented in greater detail:
Basically, this is the minimum set of metrics necessary to diagnose potential problems. Still, we would like to see some advanced network stats, such as the number of open ports or network errors. Metrics relevant to disk health would also come in handy.
Furthermore, another great feature, Cloud cost monitoring, has recently been added to Coroot:
This makes estimating the cost and node utilization for various cloud providers (AWS, GCP, Azure) a breeze — and your FinOps-aware teammates happy. It is a safe and useful feature as Coroot detects the node type without any console access.
Finally, we would like to point out that Coroot supports Pyroscope, a system for profiling applications and visualizing CPU time as flame graphs. The graphs can be rendered right inside its interface.
Coroot pros and cons
Coroot proved to be a pretty handy observability tool with a breadth of advantages:
- Its clear-cut, comprehensive service interaction scheme; you can view the status and metrics for each pod.
- You can filter the pods and see which applications are linked within each namespace.
- Handy features for monitoring nodes and customizing alerts.
- Support is offered for the Pyroscope, along with the option to render its graphs in the Coroot interface.
The drawbacks we can mention are:
- You can’t explicitly exclude any pods from monitoring, which is sometimes preferable. Suppose that pods in a project are frequently started and shut down by cron jobs. In that case, you may not need to keep track of their metrics and feed them to Prometheus. This drawback can be mitigated to some extent by incorporating a filter inside the actual agent. Nonetheless, it turns out that you cannot set any exceptions on a per-resource basis in the agent (i.e., for Deployments, StatefulSets, and Namespaces).
- The UI is fairly basic, and it certainly has room for improvement. But since the project is actively developing, the interface will likely be enhanced over time. Perhaps just like its competitor Caretta, Coroot will start using Grafana for rendering metrics at some point.
Coroot alternatives
- Caretta uses a similar eBPF-based metrics collection system and an “interface” in the form of Grafana dashboards. However, the tool suffers from a sluggish development process, and its dashboard performs rather poorly: the information on it can be rendered with errors, and it can put a high load on the browser. Overall, in our experience, the tool could be better optimized.
- Suricata is not exactly an SLO/SLA monitoring project, but its features are somewhat similar. Its agents inspect traffic, build metrics based on that, and can also display graphs of service-to-service interactions. The system is quite complex as Suricata requires an ELK stack and imports many third-party objects into Kibana to visualize the graphs.
- A while back (even before Coroot had emerged), we coded our own simple tool called iptnetflow-exporter to solve problems similar to these (refer to this article to learn more). This Go + Python application uses ServiceAccount to retrieve data from Prometheus and feed them back in the format Nodegraph requires. The visualization was based on the Grafana dashboard, and the service interaction map was implemented using the Nodegraph API plugin.
Conclusion
Coroot appears to be a rather robust solution for monitoring apps and infrastructure in a simple-to-configure yet comprehensive fashion. It may become an essential SRE part for small businesses and teams who do not require complex systems and want to set up monitoring with SLOs, notifications, and request tracing quickly.





Comments