This article explores an approach featuring application development performed right inside the Kubernetes cluster without the need for separate build and deploy operations. This approach is based on the Okteto Cloud service with the namesake Open Source tool provided by its developers. The idea behind the project is to focus on programming and save the time required to prepare and set up the environment.
How it all began
When it comes to developing Kubernetes applications, the biggest challenge you face initially is preparing the actual Kubernetes cluster. In addition to programming skills, a developer also needs an accompanying infrastructure. That may be:
- A local cluster running on the developer’s machine or on a local network.
- A full-fledged testing environment deployed by the company’s Ops engineers on its own infrastructure, including pre-configured Continuous Delivery pipelines.
All the above cases impose significant constraints with the potential to delay the start of development for a long time. These constraints include the developer’s lack of knowledge and skills in working with Kubernetes, the lack of necessary working hardware capacity, and the long wait for the right environment to be deployed in the company’s infrastructure.
These problems can be solved in many ways, and Okteto offers one such way. It allows you to develop applications in a ready-made environment, thus bypassing the long preparation phase.
Okteto can be divided into two separate parts:
- A cluster management system with a built-in assembly system:
- Okteto Cloud is a managed Kubernetes solution with advanced features that allows you to manage building containers and configure everything you need for development in GUI;
- Okteto Enterprise is an enterprise version of the Okteto management system designed for installation in your company’s K8s cluster. You will need to buy a license for this, but there is also a free option for small teams (up to three people). Okteto Cloud Enterprise turns any cluster into a full-fledged Okteto Cloud running on your infrastructure.
- Okteto CLI is an Open Source command-line utility for managing a Kubernetes cluster. It supports clusters running Okteto Cloud as well as any other cluster controlled by kubectl.
The developers recommend a cluster with the following minimum characteristics to install the Enterprise edition of the system:
- Kubernetes version v1.19 and up.
- A pool of at least 3 nodes with 4 CPUs and 16 GB of RAM per node.
- 100 GB of storage space.
You can also install it on popular cloud provider offerings:
- Amazon Elastic Kubernetes Service;
- Azure Kubernetes Service;
- Google Kubernetes Engine;
- DigitalOcean Kubernetes.
The authors provide a Helm chart that includes all the necessary system components, such as NGINX Ingress, cert-manager, and other Okteto tools required to run the Enterprise edition.
It’s also worth noting that you can explore the solution for free in the Okteto cloud. After registration, the following limited resources become available to the user:
- 5 namespaces;
- 10 Pods;
- 1 CPU per Pod;
- 3 GB RAM per Pod;
- 5 GB of storage space.
The process
The process is fairly straightforward:
- A separate namespace containing a single dedicated Pod is created in the Kubernetes cluster where development is to take place.
- Then a container is started inside the Pod with everything you need to run the application: compilers, interpreters, etc.
- The Open Source Syncthing tool synchronizes the source code of the application being developed with the container contents. Synchronization works in both ways and in real-time: any changes made to the application code on the user’s machine or right inside the container are automatically synchronized with the counterparty.
- The user can use the shell interface in the container to run and test the application.
Additional features include forwarding ports from the container to the user’s machine. This comes in handy if you need to use the debugger built into the container.
Okteto supports various programming languages and offers containers tailored to a specific stack. The authors also provide comprehensive instructions for those languages that will get you off to a fast start.
Okteto development vs. the traditional CI approach
Okteto helps developers focus on what’s important to them without getting distracted by the intricacies of setting up the CI/CD pipelines. That means that changes to the code do not require any additional operations on the developer’s part. They are immediately propagated to the container in the K8s cluster. The container then builds the application and prepares it for testing and analysis.
The Okteto authors call this development approach the “cloud-native way.” This article discusses the pros and cons of this approach and explores its principles in greater detail.
Following this path renders traditional CI systems irrelevant in the development process. There is no extra work, such as committing to remote Git repositories, setting up build machines, maintaining the container registry, etc. The entire process is reduced to saving the changes to the application and re-running the remote build in the build container.
The Okteto CLI
The Okteto CLI is an Open Source tool written in the Go programming language. It is rapidly developing thanks to its ~50 contributors: new versions are released several times a month, and its GitHub repository has more than 2,400 stars.
The utility supports all major operating systems: Linux, macOS, and Windows. A pre-built package is available for your OS/architecture on the releases section of the repository: just download the one you need and copy it to the directory in $PATH.
It can be used to manage a project pulled from the Okteto Cloud (for example, from GitHub, as we will show you later on) or create a new project that can be deployed to the Okteto Cloud or any other Kubernetes cluster.
The Okteto CLI can work with any K8s cluster. The only requirement is that the cluster must be managed using kubectl.
Please note: While you can use the tool with any cluster, we do not recommend doing so without installing the Enterprise edition of Okteto Cloud. Okteto Cloud provides many essential things, from the container registry to a web interface (a complete list of Okteto Enterprise components is available on the official website). A standalone CLI tool, on the other hand, will only allow you to deploy a dev container in the cluster and use it, with no means of managing the entire process in a convenient fashion.
To access the Okteto Cloud cluster, you must be logged into your account. You can do this right in the tool – an authentication prompt will be shown as soon as https://cloud.okteto.com is selected as the context. The system web interface has a tip on how to select the context of the desired cluster:
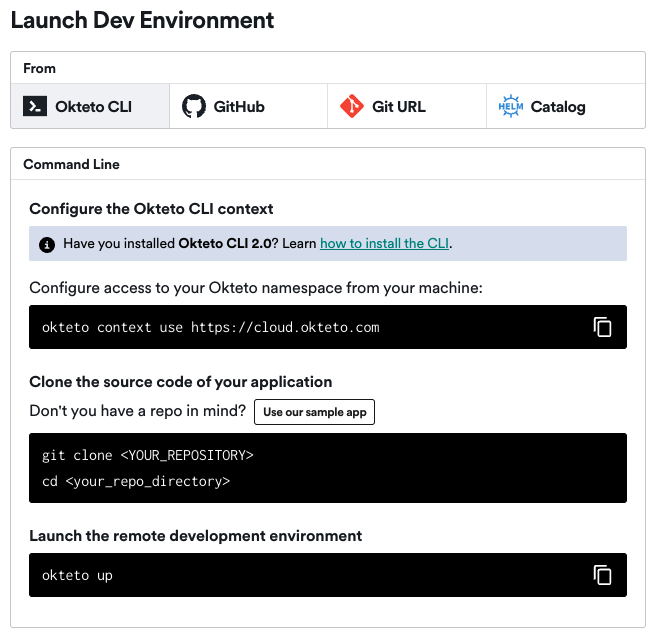
After setting the context, the utility will prompt you to open the default browser and log into Okteto Cloud.
Getting started with Okteto Cloud
System features
In addition to building an application and running it in containers, Okteto Cloud provides some additional features as well:
- Automatic SSL encryption for your application (access over HTTPS);
- The build service includes auxiliary services for building an application, similar to GitLab Runners;
- Container registry;
- Preview environments (each push to the repository will deploy a preview version of the application);
- Adding secrets (e.g., for database access);
- The option to share the namespace with colleagues. An invitation will be sent to the specified email address and, once clicked, the user will be able to access your namespace and the Pods running in it.
Pricing policy
Four pricing plans are available to users (we’ve mentioned the free one above). The first paid plan is called “Developer Pro.” It costs 19 USD per user per month and includes slightly greater computing resources:
- 10 namespaces;
- 20 Pods;
- 2 CPU per Pod;
- 6 GB RAM per Pod;
- 20 GB of storage space.
The pricing for the remaining two plans (Teams and Enterprise) is available upon request.
Registering and getting started
With Okteto, you can quickly run your application in a cluster managed by the Okteto Cloud. After registering, you can choose one of the options as a resource origin for deploying the application:
- Direct deployment using the Okteto CLI: To use the Okteto CLI, you have to pull the namespace credentials from the Okteto Cloud to your system and access the cloud straight from your terminal. In this case, the application will be deployed after you manually invoke the corresponding command.
- GitHub or another Git-based repository: You will have to provide a link to your repository in the control panel. After you click the “Launch” button, Okteto will search the repository for the files needed for deployment: Helm charts, Kubernetes manifests, Okteto stacks (Docker Swarm equivalents), docker-compose, or Okteto manifests. You can also specify additional parameters for building and deploying the application (if required) in the
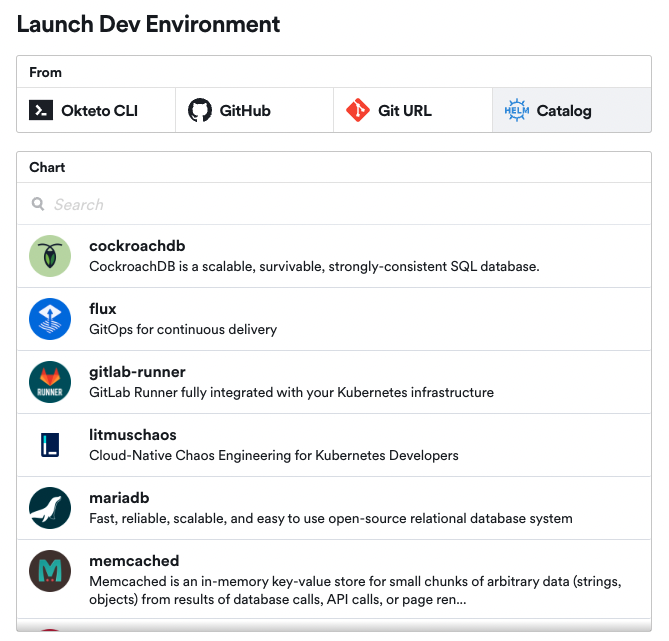
okteto-pipeline.ymlfile. - Helm directory: This option allows you to run the pre-prepared infrastructure components needed for your application, such as MongoDB, Redis, RabbitMQ, MySQL, etc. The authors claim to support many different services. If a service that you want is not on this list, you can open an issue in the repository and ask them to add what you need.
Development with Okteto Cloud
Alright, it’s time to get our hands dirty. Let’s take a look at what it’s like running and developing a simple Go application in Okteto Cloud. Our application just does one thing: it returns “Hello from Okteto!” to requests sent to the / endpoint:
package main

import (
    "fmt"
    "net/http"
)

func main() {
    fmt.Println("Starting hello-world server...")
    http.HandleFunc("/", helloServer)
    if err := http.ListenAndServe(":8080", nil); err != nil {
        panic(err)
    }
}

func helloServer(w http.ResponseWriter, r *http.Request) {
    fmt.Fprint(w, "Hello from Okteto!")
}
In order to make it work, you have to add a Dockerfile and an Okteto instructions file to the application’s source code. Copy them next to the main.go file in the repository root. The contents of the test project will look as follows:
.
├── Dockerfile
├── main.go
└── okteto.yml
The Dockerfile includes instructions for building the application container, while the okteto.yml file contains the Okteto settings: the syncing directory, ports to be forwarded, and so on.
The Dockerfile we will use is the regular one for a Go application:
FROM golang:buster
COPY . /app
RUN cd /app && \
    go build main.go && \
    chmod +x main
CMD /app/main.gookteto.yml:
name: okteto-test
autocreate: true
image: okteto/golang:1
command: bash
securityContext:
  capabilities:
    add:
    - SYS_PTRACE
sync:
# The target directory to sync the project to.
- .:/usr/src/app
forward:
- 2345:2345
- 8080:8080 # Local port forwarding.
persistentVolume:
  enabled: true
Create a new environment (Dev Environment) in the Okteto Cloud web interface. Select GitHub as the source.
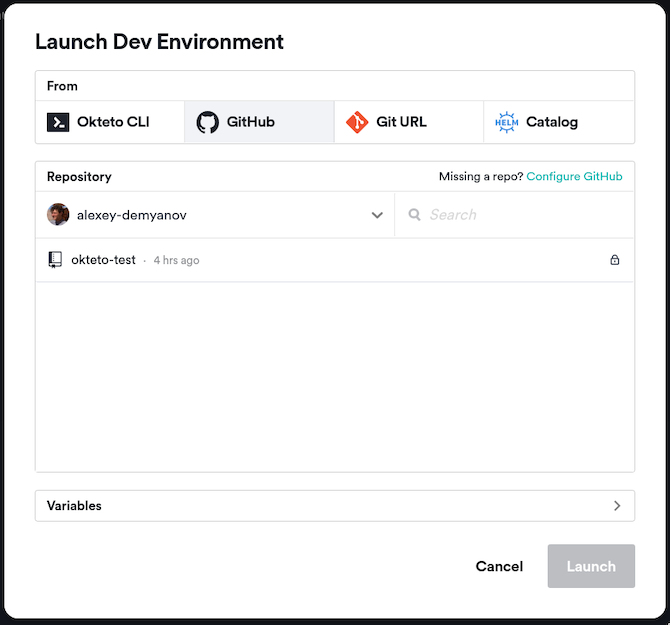
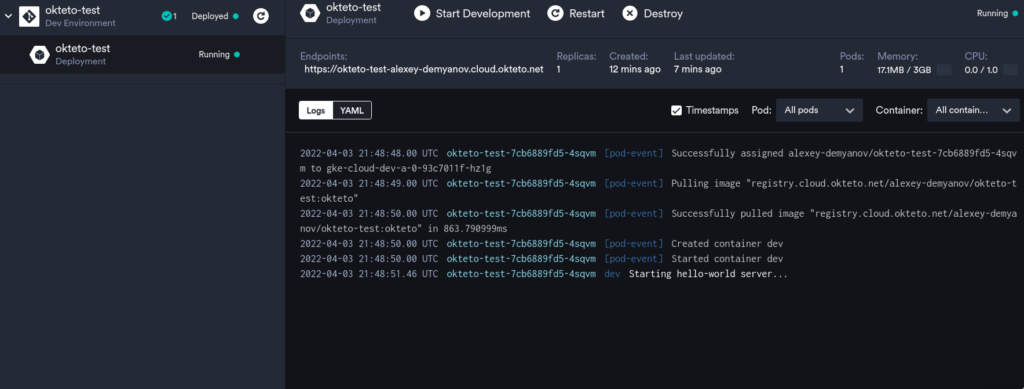
Paste the link to the project repository and click “Launch”. The system will detect the Dockerfile in the project’s root and use it to build and run the container:
Let’s check that everything is up and running by sending an HTTP request to the endpoint address generated by Okteto Cloud:
curl https://okteto-test-alexey-demyanov.cloud.okteto.net/
Hello from Okteto!
The endpoint address is also available in the Okteto Cloud admin panel. You can find it in the upper left corner of the Endpoints section:
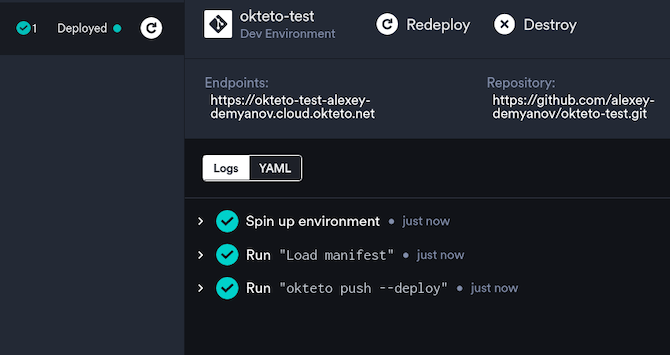
Congratulations, our application is up and running in the Okteto cluster. Let’s try to make some changes to it. To do so, first, start a dev container.
Clone the project from GitHub and navigate to its root directory. Now, enter the following command (note that the Okteto CLI must be preinstalled in the system):
okteto upThis command will replace the Dockerfile-based container we previously built with the dev container defined in okteto.yml:
Using alexey-demyanov @ cloud.okteto.com as context
 ✓  Persistent volume successfully attached
 ✓  Files synchronized
    Context:   cloud.okteto.com
    Namespace: alexey-demyanov
    Name:      okteto-test
    Forward:   2345 -> 2345
               8080 -> 8080

Welcome to your development container. Happy coding!

alexey-demyanov:okteto-test app> ls -la
total 24
drwxrwsr-x 2 root root 4096 Apr  3 22:14 .
drwxr-xr-x 1 root root 4096 Nov  9 01:11 ..
-rw-r--r-- 1 root root  109 Apr  3 22:14 .stignore
-rw-rw-r-- 1 root root  111 Apr  3 22:07 Dockerfile
-rw-rw-r-- 1 root root  311 Apr  3 22:03 main.go
-rw------- 1 root root  240 Apr  3 20:46 okteto.yml
The command will also start a shell interface in the new container: the terminal is in the container and ready for use. The application code will be synchronized with the container and prepared for changes.
Let’s modify the application by replacing the message with “Hello User!“:
fmt.Fprint(w, "Hello User!")Note that you can do this on the local machine or right inside the container and the code will be immediately synced between the two.
Let’s run the application in the container once again:
alexey-demyanov:okteto-test app> go run main.go
Starting hello-world server...
Let’s see if there are any changes:
curl https://okteto-test-alexey-demyanov.cloud.okteto.net/
Hello User!
Since Okteto has forwarded the ports specified in the configuration file to the local machine, you can access the application as if it were running locally:
curl 127.0.0.1:8080
Hello User!
Now, stop the development by clicking the “Stop Development” button, push our changes to the Git repository, and, if necessary, deploy the application to the Okteto Cloud as we did before.
As you can see, no intermediate steps (assembling the image, deploying it to the cluster, and running it) were involved in the process. We changed the code directly, then the application was restarted in the container and we got the result immediately.
Okteto vs. werf vs. Skaffold
The Okteto approach is somewhat similar to local development with werf or Skaffold. Still, building and testing the application takes place right inside the running cluster, without having to prepare a local environment. werf and Skaffold also support operations with remote clusters controlled by kubectl. However, they stick to the regular CI/CD process to keep the environments and configurations identical.
Okteto offers an out-of-the-box development environment (a ready-made K8s cluster, container registry, and image builder) and a sandboxing mechanism that allows you to develop right inside the cluster and modify the application code both locally on the developer’s machine and right inside the container since the changes are propagated in both directions.
While Okteto, like both of the other solutions, is a wrapper over the delivery elements of the pipeline, it clearly separates the development process from the delivery and does not focus on covering and improving the latter. Thus, in most cases, you have to use additional tools to implement the delivery process.
Development in Skaffold and werf focuses on making the environment, configuration, and build process identical to the production environment. At the same time, Okteto essentially provides a “sandbox” that does not restrict the user in any way. As a result, the sandbox and CI/CD configurations may differ, and the user is thus fully responsible for keeping them synchronized. Consequently, you cannot be sure that the application will work as expected when you move it from the development environment to the production one.
Still, it’s a pretty convenient development method, and it’s always up to the developers to pick tools that suit their needs. You have to decide what matters more: simplifying the process and gaining relative freedom, or keeping the configuration identical during the delivery but wasting some time going through all the stages of the CI/CD pipeline.
Takeaways
Okteto is not just a software or yet another cloud provider but a development approach that allows the developer to eliminate many resource-intensive and time-consuming tasks. It leaves you to focus only on the essential work, thus bypassing the environment preparation and cluster configuration.
At the same time, the developer gets the best of both worlds: a debugger for debugging the application, a fast “local” startup, and a fully configured working cluster environment. This minimizes errors resulting from discrepancies between the local or testing environment and the production one.
The undoubted advantage of it is you can try the provided features for free to see if this development approach suits you, as well as using Okteto Enterprise at no charge if you’re a small team.


Comments